Collections allows you to group related tours or activities together based on a theme or location. This helps your customers easily find curated sets of experiences, making their search quicker and more enjoyable.
For example, if you offer adventure activities like hiking and rock climbing, you could create a collection called “Outdoor Adventures in Colorado” to showcase all the tours available in that region.
When you create a collection, it appears as a unique page on your website, making it easy for customers to browse through grouped offerings.
Step 1: Creating a Collection
Here’s how you can create a new collection for your website:
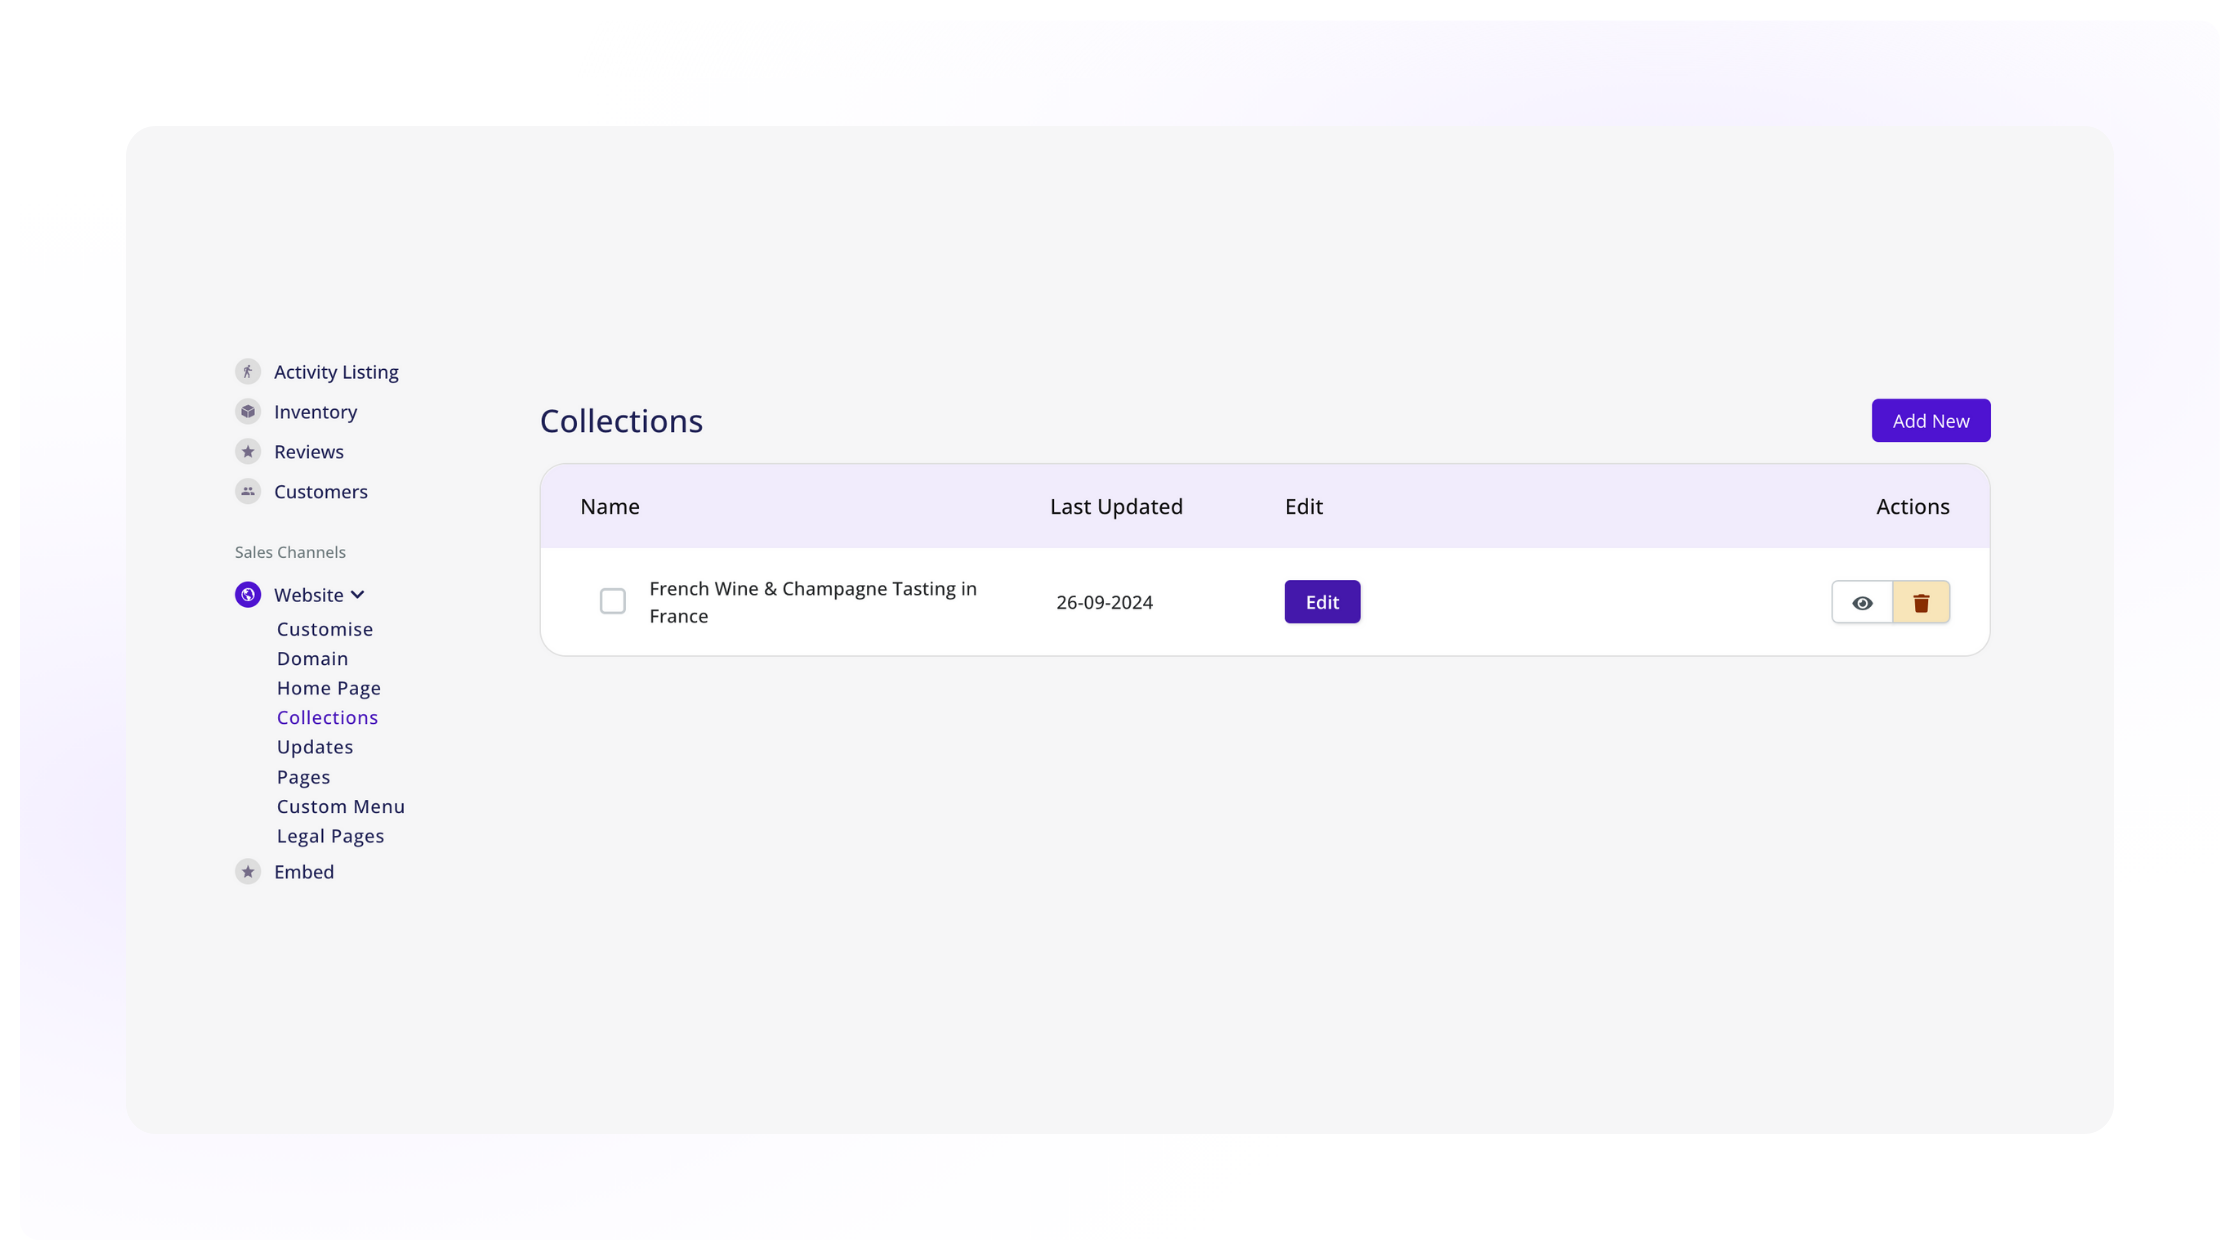
- Navigate to Website > Collections from the left menu.
- Click on the Add New button in the top right corner.

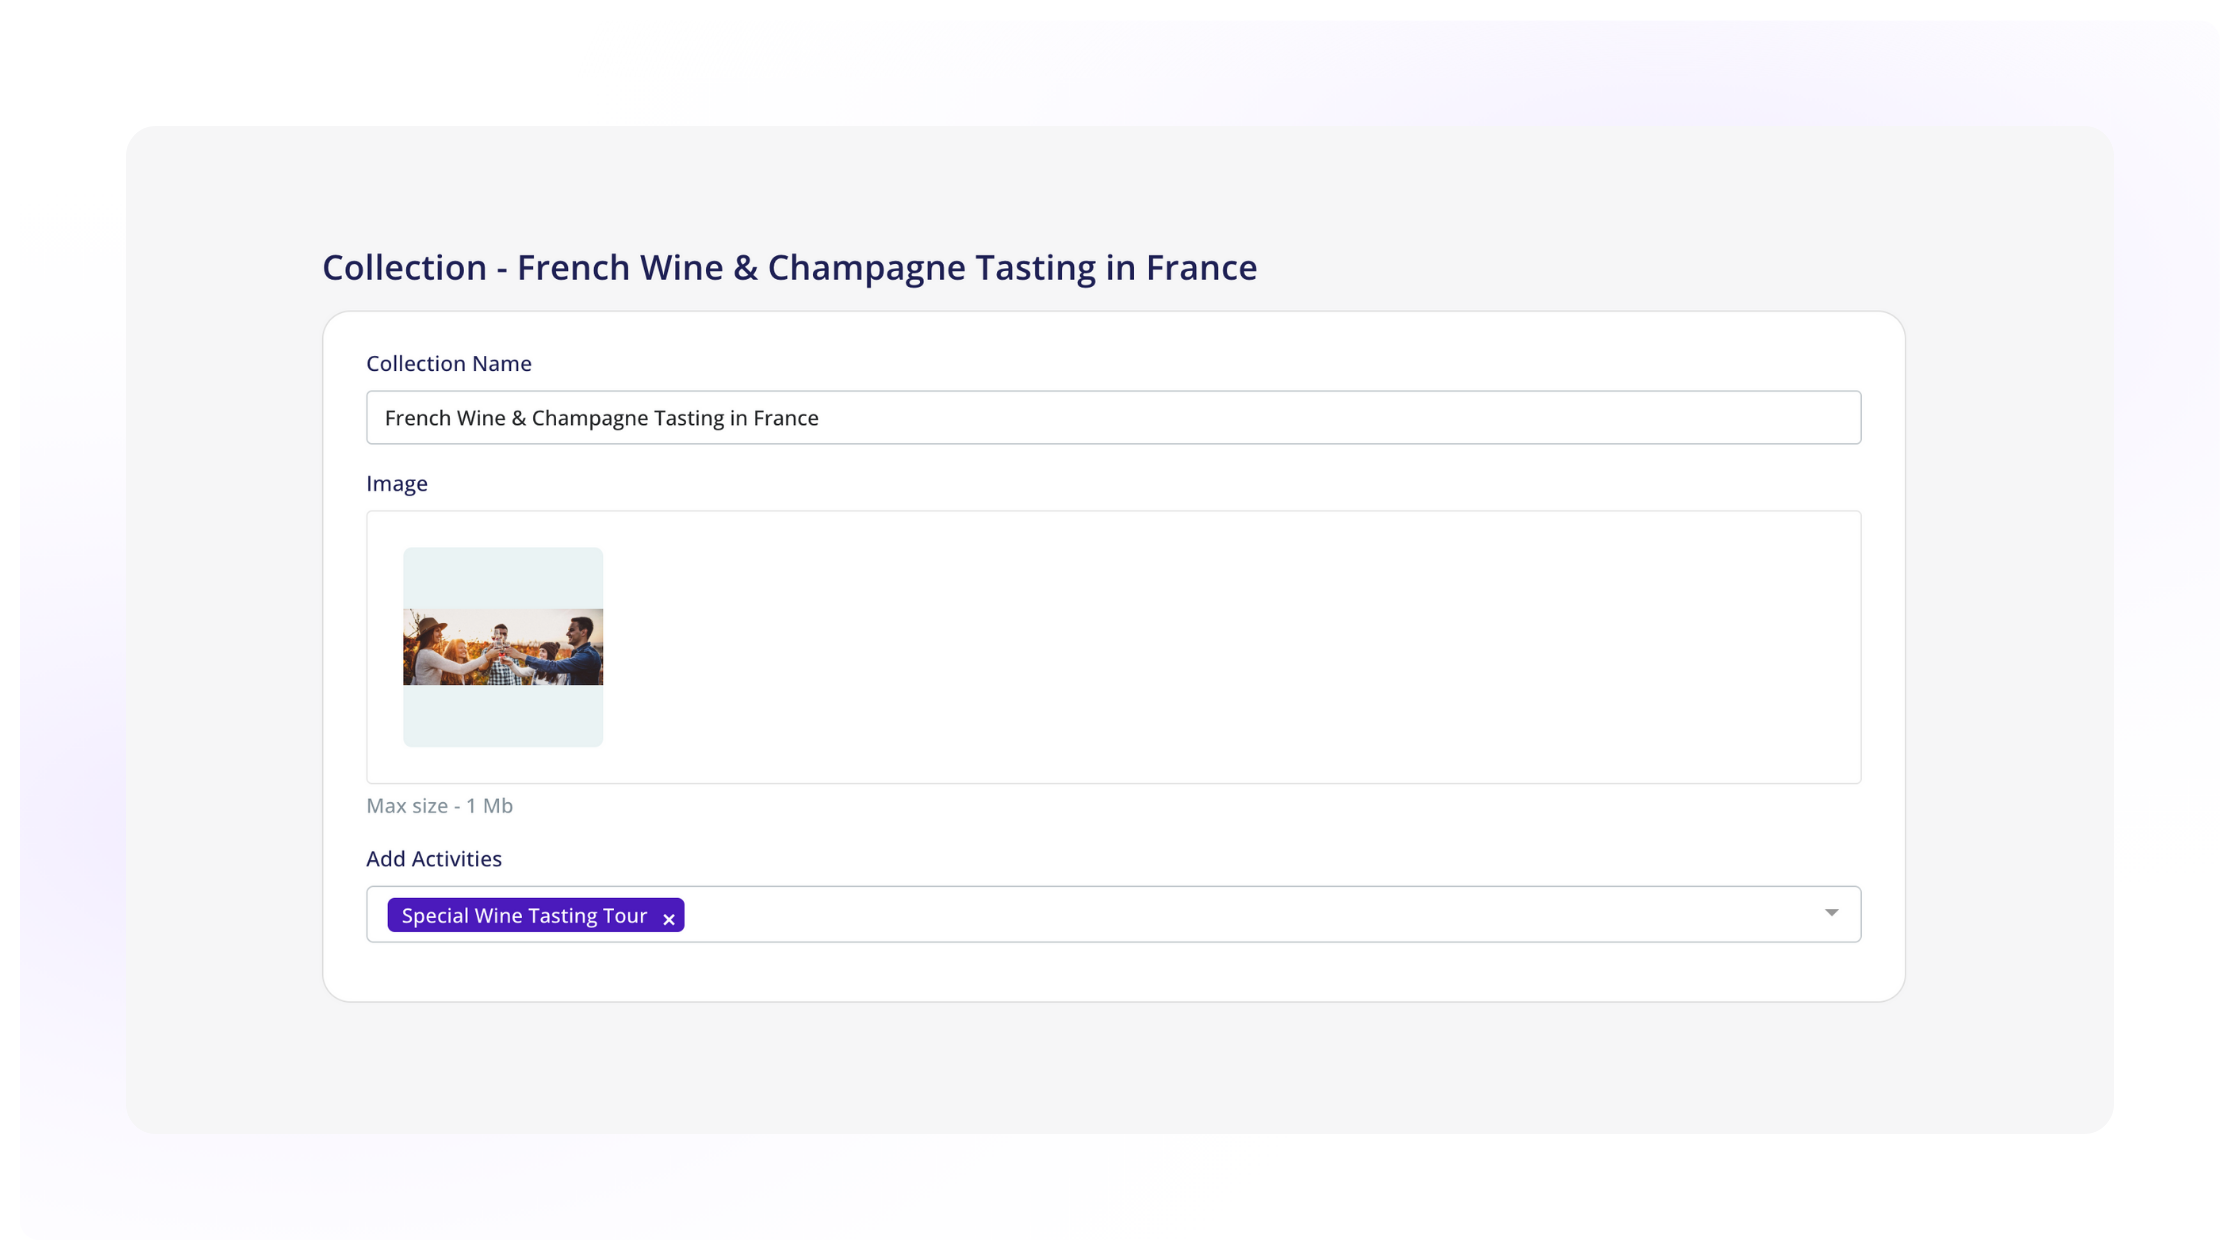
- Fill in the following details:
- Collection Name: Give your collection a unique and relevant name (e.g., French Wine & Champagne Tasting in France , Fun Activities for Kids in France).
- Image: Upload a header image (max size: 1MB) that will display on your collection page.
- Add Activities: Select the activities you want to group under this collection.

- Add SEO details like:
- SEO Title
- SEO Description
- SEO Keywords (Optional)
These will improve the visibility of your collection on search engines.
- Click Save to create the collection.
- To publish it on your website, make sure to check the collection under the Collections section in your dashboard.
You can create as many collections as you like, and they’ll be displayed as separate pages on your website.
Step 2: Publishing Collections
- Go to Website > Collections from the left menu.
- You’ll see all the collections you’ve added so far.
- To publish a collection, check the box next to the collection name.
- If you want to unpublish a collection, simply uncheck the box.


