Meta Pixel integration is a powerful tool for enhancing your marketing strategies. By collecting valuable data on website traffic and conversions, this integration empowers you to optimize your ads, refine target audiences, and effectively retarget users interested in your business.
Setting Up Meta Pixel
To begin leveraging Meta Pixel, ensure you have a Meta page (a personal profile won't suffice) and that your website is publicly accessible.
Create your Dataset
Meta has transitioned from Pixel creation to Dataset creation for web event setup. Follow these steps to create a dataset:
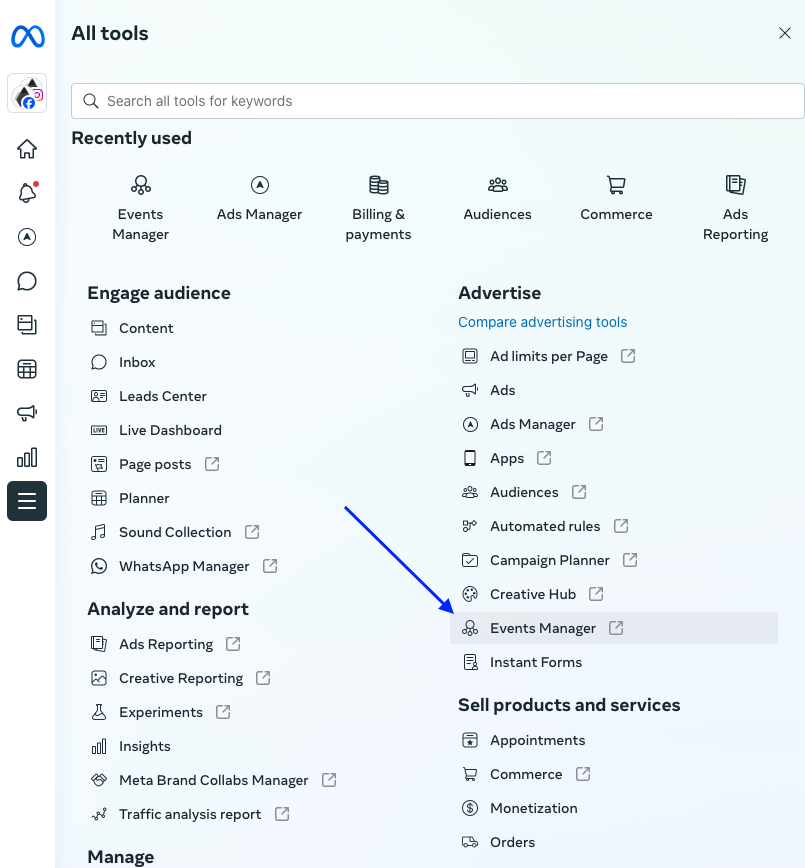
- Navigate to your Meta Business Manager, access Business Settings, and proceed to Event Manager
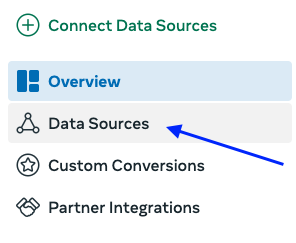
- Navigate to Data Set and add a new dataset by providing a name and creating it.
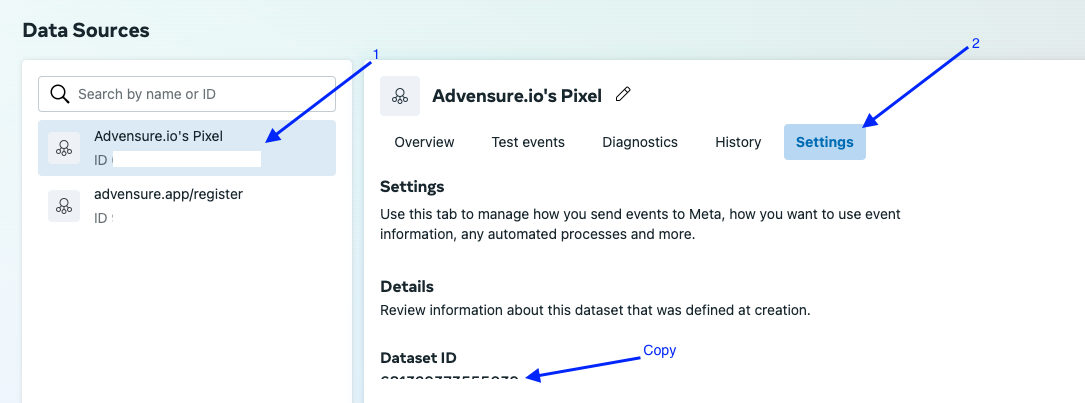
- Copy the generated ID for integration into your website settings.
Integrating Datasets with Your Website
- Navigate to Settings > Integrations > Meta Pixel
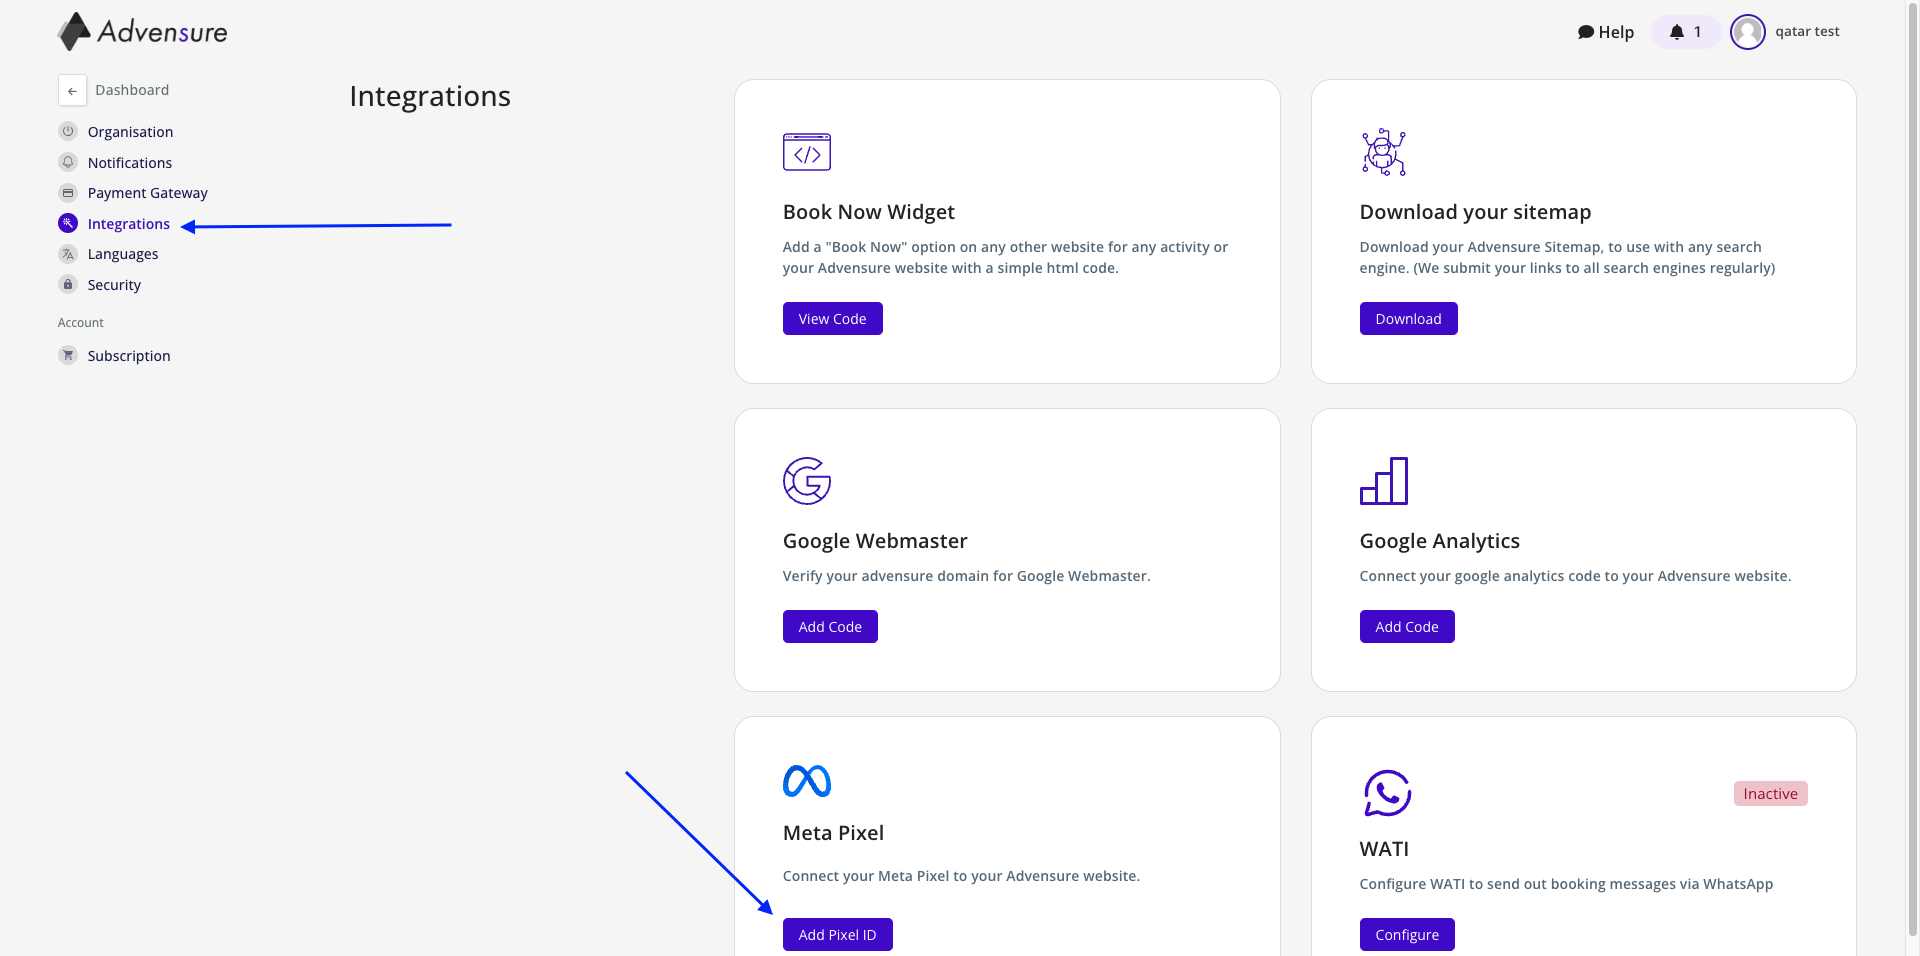
- Add the dataset ID in the field provided.
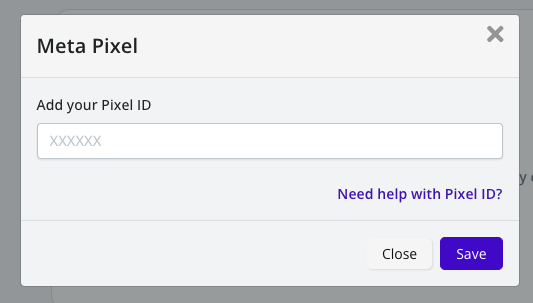
- Save the changes and update your website.
Validating Meta Pixel Connection
Before proceeding, ensure the following:
- Your website is live and Meta page is public.
- Your dataset ID is correctly integrated into the website settings.
- Avoid duplicating pixel IDs, as this can lead to inaccurate data.
- Domain verification for Meta is completed.
- Optionally, add your website domain to the "allow" list in Facebook pixel settings.
To confirm successful integration, use the Facebook Pixel Helper extension in Chrome to monitor events and validate your setup.
Note: If you encounter issues finding the extension, pin it to your browser toolbar for easy access.
By following these steps, you can effectively harness Meta Pixel integration for enhanced marketing performance.


